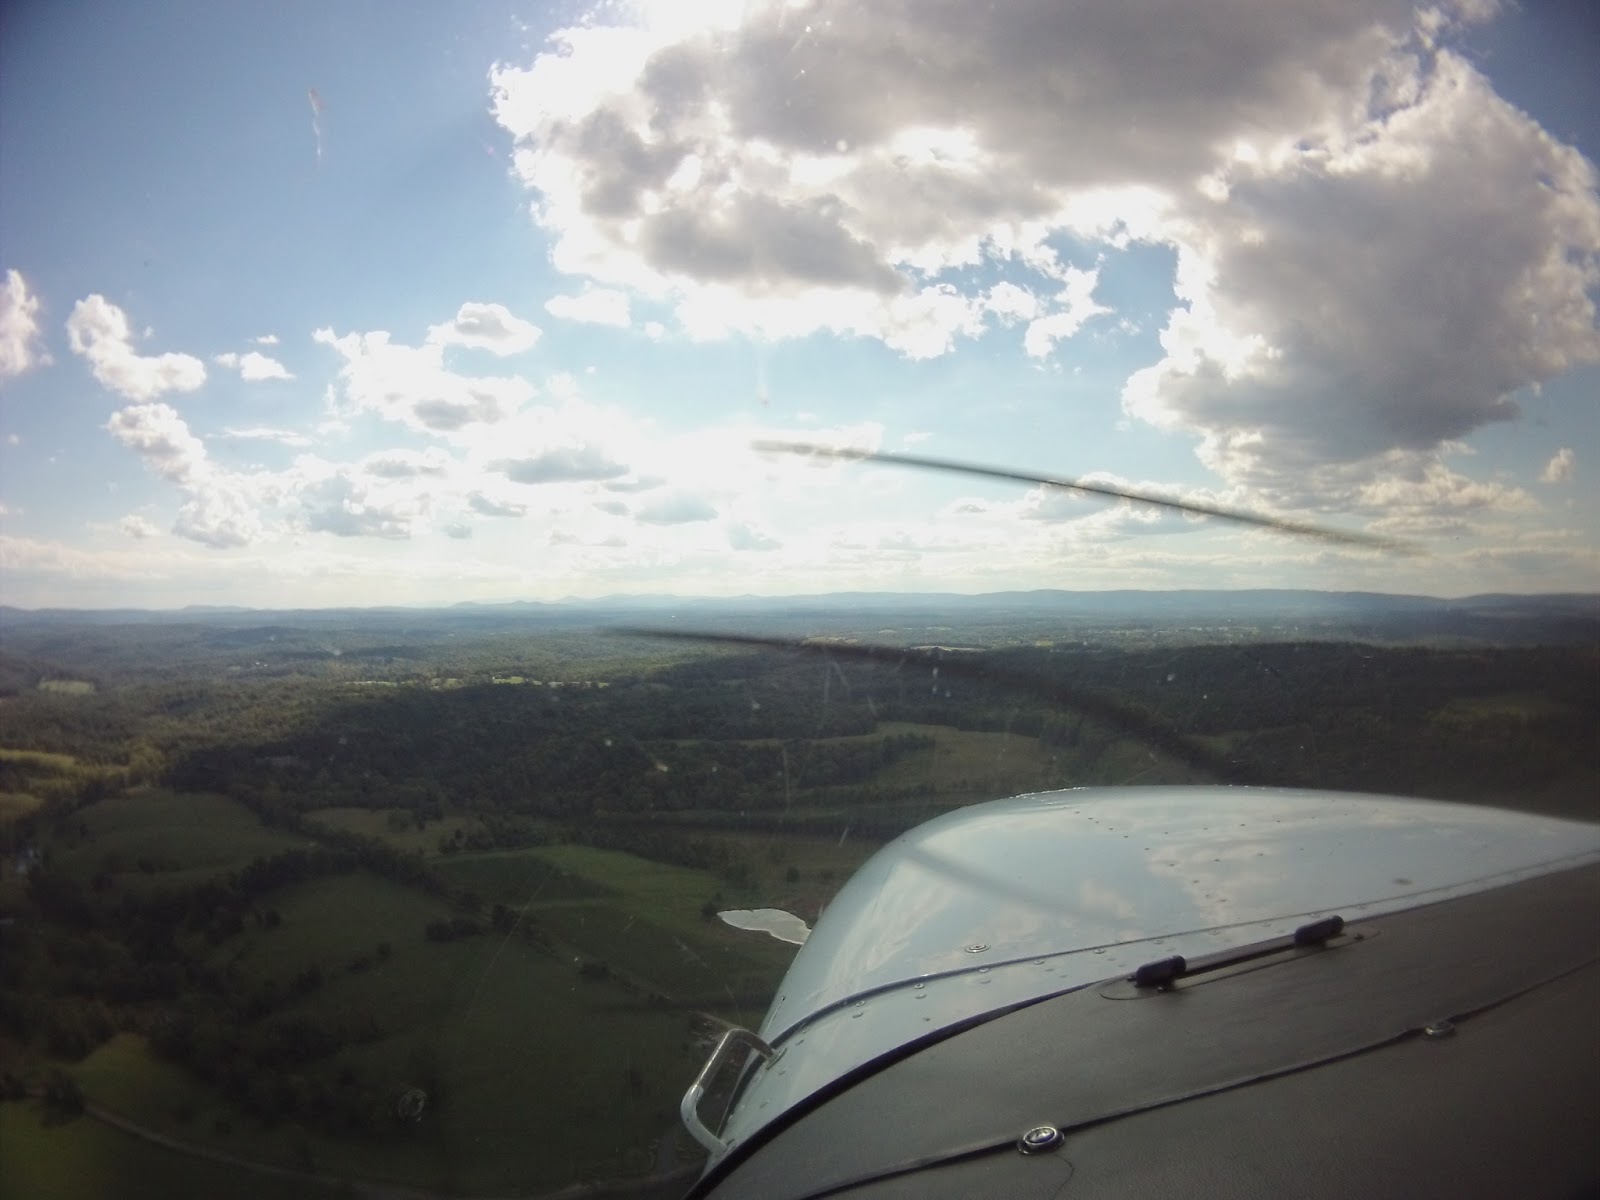
As somewhat of a last minute thing, a coworker of mine asked if I wanted to go flying so he could get his night currency back. I almost declined, having just gone last weekend, but since Eric is a CFI and I need to continue chipping away at the instrument requirements, I figured it was a good opportunity.
Since I didn't get my Grant County (W99) flight in last weekend, I figured I would fly the approach there, stop through Winchester (OKV), and then head back to Leesburg (JYO). That would give him three takeoffs and landings, and it would get me a decent amount of simulated instrument time.
Departing to the west, I put the blinders on and picked up the Linden (LDN) VOR, which is the initial approach fix for the LDA/DME-B approach to W99. Since LDN is pretty far away from W99, it gave Eric plenty of time to ask general flying questions before we concentrated on the actual approach. Unfortunately, in order to keep the localizer in the NAV1 spot, I had to put LDN in the NAV2 spot which was unlit. You can see the oscillations in the track as I wasn't as on top of it as I should've been (first going southwest towards LDN, and then I turned too early to the west, away from LDN). In any case, I made it onto the localizer in the end, which put me right on top of the field.
As you can see on the chart, the airport is surrounded by terrain, so much so that a straight-in approach cannot be made with the necessary safety margins required by the FAA. For this reason, the LOC is offset 25 degrees from the actual runway heading. Moreover, this is also why it is a localizer-type directional aid (LDA) approach instead of being a localizer (LOC) approach.
For those who aren't pilots, localizers are normally placed at the far end of a runway and provide lateral guidance to it. In this case, the localizer has been placed to the left of the runway, on the near side, because of terrain. Being on the near side means that it is more sensitive, and therefore slightly more difficult to track, when compared to a normal LOC approach at similar distances from the field. Additionally, because of the offset and the terrain, the minimum altitude you can descend to on the approach is 1540 feet above the elevation of the airport. Because you're so high, so close in, it is designed as a circling approach, where you wouldn't normally immediately line up with the runway to land (note that the chart only lists "circling" at the bottom, with no "S" - or "straight-in" - minimums); rather, you would spot the airport closer in, circle around the airport to lose altitude, and then to land. You can see this in the CloudAhoy track below (the knot at the far left of the blue line). While the concepts of the various approaches are similar, approaches like this offer somewhat of a challenge, when compared to those offering straight-in procedures (which is what you experience on 99% of commercial flights if the weather is poor).
I ended up overflying the field, and passing the controls to Eric so that he could make his landing. After a quick full stop landing with a taxi back, we departed to the north to avoid terrain. If you look back at the approach chart, you'll see that there is a valley north of the field to follow until you clear the mountains. Once above the terrain, I took the controls again with the blinders on to log more instrument time towards OKV. After Eric had OKV in sight, I passed the controls back to him for a lap around the pattern and a full stop landing. Since the weather was nicer, a few others were taking advantage of it for night currency as well, so I called traffic with the blinders off while we were in the pattern.
One of the pilots who landed before us decided to stop right next to the taxiway for some reason, but we managed to get by. After the departure, I put the blinders back on and took us back to JYO. Once again, Eric called the field in sight, I passed him the controls for the landing, and that was that. By the way, if anyone wants to see the perfect example of a full stall landing, see this guy.
From all of the questions throughout the flight, it seems I need to dig back through the books to brush up on some of the items I've forgotten over the years. It was a great flight, though. He has his night currency back, and I have 1.6 more hours of the instrument requirement (not to mention 1.6 more instrument dual).
Hours: Pilot in Command Cross Country (PIC XC): 2.1 - 84.1 (of 50) Actual/Simulated Instrument (Act/Sim): 1.6 - 13.7 (of 40)
Any time I have the thought "back in my day," I like to laugh at myself as I'm neither old in age nor in pilot experience. After having used CloudAhoy on a few flights, however, I can't help the thought. Reviewing my training flights, or flight performance in general was all manual, based off of what my instructor and I both remembered during the flight. In some cases, one of us would scratch something down on a piece of paper as a reminder, but the post flight analysis was based off of our recollections of the flight, regardless of how our memories were jogged.
Enter CloudAhoy.
Where I once tried to re-fly the flight in my head and pull out the noteworthy parts through memory, I now have the flight recorded and tracked in its entirety.
When I first downloaded the application and looked at the user interface, I laughed. There are four boxes to enter your data - tail number, your name, a co-pilot or CFI, and optional remarks - two areas showing your connectivity to data (3G or wireless) and GPS (internal or external), and two large start and stop buttons. It's as simple as that. Press start before you start the engine, and press stop when you're done. It also has an auto-stop feature (enabled/disabled on the settings page), which helped the one time I forgot to press stop, but I couldn't tell you what triggers it. I'm guessing it was either the GPS getting turned off, or just that it noticed I hadn't moved in so many minutes. In any case, the initial user interface is extremely simple, which is what drew my laugh initially. It was only later that I picked my jaw up off of the floor because of the amount of data that hit me post flight.
After the flight is where the magic is shown. If you think the app looks too simplistic on the flight screen, wait until the flight data is shown on the debrief screen. Switching from the iPad to a computer yields even better results, like the ability to utilize the Google Earth browser plugin for more features. Either way, in the app or on a computer, the left panel allows you to view the flight, broken up into segments automatically by default. If the app detects you are taxiing, or taking off, or flying a turn around a point, or a chandelle, or landing, it will automatically section that data off so that you can analyze that part of the flight on its own. Automation is never perfect, so it sometimes grabs items that it shouldn't, but that hasn't caused any huge issues for me so far. As an example, on my last flight it snagged one of my laps around the pattern as a left 360 (the yellow line in the picture). Various colors help you to see the various maneuvers. The blue lines are normal flight, with the white and amber being approach and touch-and-go segments, respectively. All of these segments, again, are recognized automatically.
What about the non-standard, or very specific segments, you ask?
You may remember from the flight up to Harford County that I flew the GPS approach to the airport. The entire GPS approach was shown as blue (normal flight - pictured above), as the app saw the approach as nothing out of the ordinary. Trying to keep up with, and set the program up for every single approach out there would be nearly impossible. Instead, the developer created a CFI tab so that you could add your own maneuvers. This way, you can add the maneuvers you plan on flying before the flight, and your CFI or co-pilot can simply click on the begin and end buttons for each maneuver. This allows you to track, color and name each maneuver so that you may analyze them separately. Additionally, you can also track your hood time by adding that as a custom segment type.
The flight marker option allows you to simply mark a specific point in the flight to remind yourself later on. While the option isn't as specific as defining a segment, it's a lot faster for situations that happen on the fly. The note in the program states: "in flight, when you want to mark an event, tap the event marker and optionally write a corresponding comment on a piece of paper. The tap will result in a number marker shown on the flight path at the current location. Each tap, increments the number. You can later discuss these comments with your student during the debrief." Having this tab back when I was training for my private pilot license would have really helped me out.
The last tab is a settings tab that allows you to select an auto stop feature, disable broadcasting in flight, lock the screen, and set up your CloudAhoy account.
For those of you currently in any level of training, if your instructor does not currently use CloudAhoy, I would recommend talking to him or her about adding it as a tool for your flight training analysis. It could really have a significant impact on the way that you learn and progress through training. After all, one of the fundamentals of instructing, and therefore learning, is critique and evaluation, which this tool would only further enhance.
The only potential negative I found with the application was that it doesn't come with a manual. Granted, we often joke that people rarely ever actually read said manuals, but one would still be helpful for reference. To the developer's credit, however, there are several locations with information buttons explaining what the feature is meant to do. The above quote about flight markers came directly from one of those in-app buttons.
Overall, it's a great app and you really can't go wrong with it. Beyond that, it's free, so you have nothing to lose. Try it out on your next flight and see how it can help you debrief after a flight.
After my trip to Italy, I had to jump right back onto another plane to head to San Antonio (SAT) for work, which meant I spent quite a lot of time in aircraft this month. As I was sitting on the connecting flight through Atlanta (ATL) to Dulles (IAD), I ran the mental math and it came out to be about 25 hours in the back of commercial aircraft. Of course, even though I spent all that time in aircraft, I couldn't log any of it. After landing at IAD, I decided that I'd take a plane out before the month's end so that I could at least log a couple hours.
After blowing up Facebook asking people if they'd like to join on a trip to Charlottesville (CHO), Phil and I worked out a plan for what we'd like to do. As with all plans down to CHO, we would fly down, grab some food from Timberwood, and fly back. Since Phil's brother was down near CHO, we also diverted course slightly to fly over where he would be.
When we got up to the airport, there was a sign up on the desk saying "NO STUDENT SOLO," which I asked about, because the weather seemed to be mostly okay, despite a lower scattered layer of clouds than what the METARs and TAF indicated. Apparently the conditions on the other side of the Blue Ridge mountains (towards Winchester - OKV) were marginal at best, which is where the practice area is. I was warned to be careful about low clouds, and to keep it legal. For those who aren't quite clear on why it would be illegal, the reason I've been doing all of this flying is to get my instrument rating, which, in simple terms, allows me to fly in clouds and poor weather. It's a separate rating because it is more difficult to control an aircraft and navigate by looking solely at gauges and dials in the aircraft, and not out the window. Until you have that rating, you have to keep away from clouds.
After another quick check of the weather both online and outside, Phil and I set off to take up a plane in the fleet that I had not yet flown. Oddly enough, the last time I flew, I walked by it noting that fact and thought to myself "maybe next time." Phil checked the fuel while I gave the aircraft its shakedown, and then after tossing way too many electronics into the aircraft, we set off towards CHO.
As soon as I could, I threw the blinders on after departure so that we could both start logging time. Phil kept us clear of the clouds, while I brought us out towards Upperville (2VG2), and then slightly west of the normal course to overfly Wolftown, VA. We had to descend a couple times to avoid the clouds, but they lifted as we flew south. After practicing a couple turns around a point, which turned out to be the wrong point (house), we almost gave up to land at CHO when Phil got a text message with his brother's location in a field. After turning around, we spotted them standing next to their truck and took a couple laps around them before heading back towards the airport. On the way, tower assigned Runway 3, and then switched it to Runway 21 because the wind shifted. The change in runway ended up saving us some time with a straight in landing.
The video picks up after passing Piney Mountain. The banter in the background is both Phil and me negotiating my target on the runway, which ended up being the old numbers and the new thousand foot markers. After that, you can hear me groan a bit as I realized I missed it, Phil asking if I'm going to get the nose up for once, and then me groaning a second time about letting the plane float. The landing was pretty smooth, but in an effort to jump off at the first taxiway I pressed a little too hard on the right brake, causing it to skid. You can hear me jokingly denying it and then reading back the taxi instructions before the clip ends.
[Video got lost when Contour closed down for a while.]
We passed a Gulfstream on the way in, and for the first time in the entirety of parking at Landmark, nobody came out to park me. I, of course, took it as an opportunity to park wherever I wanted, and did just that. The rampies were actually busy towing another plane, but one stopped by to check on us and see if we needed fuel before returning to marshal another plane out. It was only after walking inside that we found that the crew car had just been taken by the pilots of the aforementioned Gulfstream. I gave Keya a hard time about letting someone take my car, but her retort was something to the effect of "well I had no idea what to do with it since you haven't been around in so long." Valid point. It wasn't a huge deal in the end as she just dropped us off with their van.
Brief pause for Clint Eastwood burger consumption.
Getting ready to head back, I paid for the fuel, and then Keya asked me a ton of questions about the Superbowl in order to get some idea of how to fill her pool sheet out. Phil and I walked back outside to set up all of the electronics again, started up and set off towards JYO. Since I've started a tradition of my own signature departure from CHO, here's the video of it.
[Video got lost when Contour closed down for a while.]
After turning on course, I threw the hood back on to log more time, which amounted to 0.9 hours of hood time for the day. Just 0.5 hours left before I could finish the rest of the instrument requirement in a simulator if I really wanted to, but where's the fun in that?
Getting closer to JYO, and after switching controllers, our radar service was terminated because the radar up at IAD wasn't picking us up in all of the snow. For a second, we came back up, but then dropped off again, so I told the controller we'd cancel the radar services and just utilize the normal JYO Maneuvering Area procedures. It added a couple minutes to the flight, but it also kept us from giving the controller a headache. The clouds dropped back down again, along with the visibility because of the snow falling. Similar to the rain video I got a while back, the snow looks like you're hitting light speed as it flies by. It was somewhat unnerving to hear Potomac working an IFR flight on the ILS Runway 17 approach to JYO as we continued in visually, but we sequenced ourselves properly over the frequency, landing in between that IFR Cirrus, and another VFR Bonanza behind us.
Right before I shut down, I snagged the AWOS weather report for insurance in case anyone questioned how visual the weather really was: KJYO 262115Z AUTO 32005KT 5SM -SN BKN038 OVC044 00/M02 A3026 RMK AO2
I wouldn't recommend buzzing around an area you don't know very well in conditions like that, but if you know the area well and have good tools for situational awareness, you can remain reasonably safe even in degraded conditions. I'll put it this way: I'll take those conditions in the day over clear and moonless with a low altitude at night.
Another awesome flight for the books.
Hours: Pilot in Command Cross Country (PIC XC): 2.0 - 76.2 (of 50) Actual/Simulated Instrument (Act/Sim): 0.9 - 10.5 (of 40)
Phil and I have had plans to go flying for a while now. Originally, it was a flight back in May, but that got cancelled so I flew out west on my own. I'm pretty sure there were a few plans in between, but more recently we were thinking of helping a friend get home to Upstate New York. Those plans also got cancelled as well, so like the flight back in May, we thought we'd head up to State College, PA. Yesterday, we decided that flight would be a little longer than we would've liked, so we cancelled those plans as well and opted for a challenge instead.
To be honest, that last paragraph reminds me a little of this:
Back in February of 2010, I went for a flight out of Harford County Airport (0W3), right after one of the Snowpocalypse storms. If the 2000' x 40' runway wasn't enough of a challenge, some of the snow plowed off of the runway was piled at the ends. It wouldn't be enough to force pilots to hit a 2000' x 40' target, though. Why not add in a 24' telephone line 500' from the runway, and some giant trees just beyond that? This is also not mentioning that I hadn't flown since August of 2008 prior to that. Despite it being a challenge, I really enjoyed it. I think that was the reason I enjoyed it, actually. It's a challenge.
We started the day early in weather that could only be described as "severe clear." Clear weather, however, makes no mention of temperature or wind. While it wasn't too incredibly cold, it was cold enough to put frost on the wings. The wind only added to the chill at a steady 6 knots. Phil preflighted the plane while I de-iced the wings of our plane, and several other aircraft on the way to put the de-ice bottle back inside. Back outside, I got the interior all set up with Phil. In the last flight narrative, I made fun of myself for the amount of technology I bring with me, but we essentially doubled it this time. Phil had his GoPro, iPad, Dual XGPS150, and the audio setup. I had my Contour, iPad, Garmin GLO, and audio setup as well. Why not?
After starting and heading down to the end of Runway 35, I called Potomac to get my SFRA flight plan activated. Apparently they didn't get it, though, so instead of bothering with Flight Service, Phil and I gave up the plan of a shortcut through the SFRA and just departed north, up and around it. On climb out, my iPad was not agreeing with the Garmin GLO for whatever reason. Phil ended up getting it sorted through cycling the power on both. Once that was all sorted, I threw the blinders on so that we could both log time (and I could continue to chip away at the 40 hour instrument time requirement).
Because we didn't get an SFRA clearance, we flew a route that would hug the outside: DINUW LINSE TAFFI 0W3. In order to log another approach, I flew the RNAV (GPS)-B off of TAFFI.
One of the issues with flying GPS approaches is that you never know whether or not the GPS database in the aircraft is up to date when it comes to renting from flight schools. It all depends on the school, really, but the one I rent from tends to be pretty good about keeping the aircraft up to date. The ever-so-trusty N172DR has a KLN-89B, and looking at the unit, it seems pretty simplistic. If you're a flyer of an aircraft with a simpler-looking GPS, don't discount it too much as a lot of them have some pretty neat features buried in them. Unfortunately, most of the CFIs don't know a lot of the features and normally only show you how to use the Direct-To feature. That's nothing against them, really, as some fleets have different equipment in just about every plane, but it's tough to utilize the tools in front of you if you've never been shown how. If you're not going to be shown the neat features, you might as well go learn them on your own. The KLN-89B actually has a free simulator that's out there on the internet. Unfortunately, I can't find a link from the manufacturer, but I did find a link through Software Informer. If you fly with a different unit, there's probably a free simulator out there somewhere as well. To be honest, the only reason I knew the KLN-89B had a moving map and an approach database was through the simulator in the link.
So, all that to say I was able to load the GPS approach after TAFFI through a little homework. Since the GPS was only going to give me lateral navigation, I flew the approach with step downs. Looking at the track in CloudAhoy, I didn't do too poorly. At the far left, you can see a very subtle bend in the track, which is my turn over TAFFI. After that, the more obvious turn in the middle is SNAZI, where you can see I turned a little more than necessary, and had to adjust closer to the field in order to land on Runway 10. I'll review CloudAhoy in another post, but check out the screen capture in Debrief Mode.
When I began the approach, I checked BWI's ATIS as noted on the approach plate, as there's no weather station on the field. It noted the wind was 040 at 9, meaning a nice crosswind for the approach, but nothing too unmanageable. After the little sidestep at the end of the approach, I brought the plane in for what I thought would be a nice showing of my landing skills. Unfortunately, the weather had other plans. The 9 knot wind wasn't so much of a 9 knot wind as much as it was a gusty 9 knot wind. It wasn't until I landed and checked the weather that I found out how gusty exactly.
In any case, here's the video of me fighting the crosswind down to the runway. Closer in, you can hear Phil say "nosewheel," anticipating me hitting nose first as I bring it in typically flat. I think I managed to hit the mains first, but wound up airborne again. I couldn't get it to settle and the end was coming up quickly, so I went around. Note the telephone line and giant trees at the end that I mentioned earlier, too.
[Video was here until Contour closed down for a bit, and all was lost.]
After going around, I wrapped the pattern back around to try the approach to Runway 28. In the video, you can see that the wind sock shows the wind somewhat favored Runway 10, but the last time I flew here I used Runway 28, so I figured I'd try that.
The second approach wasn't any better than the first, so I went around. The third attempt, however, was good enough to set down. I won't say it looked pretty because it really didn't, but I at least made it down to the ground, despite a gust picking the right wing up slightly, causing me to drag the right wheel while trying to brake. Thankfully, I had Phil to dump the lift by raising the flaps when I called it.
The video picks up on final, and you can definitely see how close you come to the trees and the telephone lines this time around. Contour changed the style of the videos as well. I'm not so much of a fan of the new overlay, but it is what it is. Just make sure not to pay attention to the speed display. It's not very accurate, which you can see as it still displays 70 mph when I'm pulling off the runway.
[Video was here until Contour closed down for a bit, and all was lost.]
As I exit, you can barely hear me coordinating with the aircraft holding short of the runway, who I later joked with about the luxuries of longer runways. Because I don't have any specific audio editing software, or audio hosting for that matter, I made it into a short YouTube clip:
After that departure, we headed back to JYO and I put the hood back on. Closer to Frederick (FDK), I remembered that they now have a tower and that I would need to avoid their airspace, or call them up. I opted for the former by climbing above it. The controller seemed to have his hands full with a couple pilots still adjusting to the relatively new tower, and I didn't feel like adding to his workload. After turning south, I handed the controls over to Phil so he could get in a landing. Compared to my landings, his was nice and smooth.
Here's the evidence:
[Video was here until Contour closed down for a bit, and all was lost.]
After I got home and checked the weather, it turns out that BWI's weather information updated right after I flew the approach. This report matches more of what I felt:
For the non-pilots among us, this is saying that the weather at BWI (KBWI) today, at 1454 UTC (171454Z), had wind from the northeast at 12 knots gusting to 21 knots (04012G21). The rest is sky conditions, temperature and pressure.
Definitely an airport I would return to - wind or not. I loved the challenge.
Hours: Pilot in Command Cross Country (PIC XC): 1.8 - 74.2 (of 50) Actual/Simulated Instrument (Act/Sim): 1.3 - 9.6 (of 40)
If any of you reading this took a look at my review of the iPad, ForeFlight and the Garmin GLO, you'll remember I briefly mentioned the Dual XGPS150, but I didn't go into much detail. Reviews are all well and good, but they get better if you have something to compare different products. Luckily, my friend Phil has the Dual XGPS150 and let me borrow it for one of those little comparative reviews.
Before I jump into the actual review, I want to point out what I checked on each of them:
Ease of use (power on/power off, really - there's not much else to them), ease of Bluetooth connectivity, time to connect via Bluetooth, time to acquire satellites for position, time to acquire satellites for altitude, and general user interaction. As far as acquiring goes, I used hot boots, meaning I let each one boot up fully and acquire, shut them off and booted again within a minute. I've also thrown in some manufacturer statistics like battery life (sorry, I'm not sitting there with a stopwatch to time that for you), and size.
The Dual XGPS150
Not much needs to be said for the XGPS150. Even if you've casually glanced at the product on Amazon, or anything of that sort, you'll see the raving reviews. It's really simple, compact, and easy to use. Out of the box, you get the unit, a non-slip pad, a strap (for wearing, or securing more permanently in a car/aircraft), a USB charging cable, and an adapter to charge it in a car or properly equipped aircraft, all for $99.99 (as of writing).
The small size - a 2.25" square - makes it easy to store without taking up too much space, and it has a weighted feel to it that just feels sturdy. The red circle in the middle is a large button to turn it on, with the pressure point being slightly below center. Said button takes a firm prodding with your thumb to turn it on, but if it's being stored in a pilot bag, or similar, you don't want the button to be too easy to press. Pressing and holding once again will turn it off. On the side of it, you'll find a door that hides the USB charging port and a button that switches the data format from Apple to everything else.
Holding down the button for a few seconds will bring it to life with all of the lights confirming you have, in fact, brought it out of its slumber. At that point, the appropriately blue Bluetooth light begins flashing to let you know that it's in discoverable mode, while the green GPS light flashes until it picks up the required amount of satellites. Going into your iPad's Bluetooth panel, you'll find XGPS150-[serial number]. Click to connect. Begin using it.
If you're interested, you can also download an app from the app store that allows you to see what's going on behind the scenes with the device. I'd explain further, but pictures are better:
The Garmin GLO for Aviation
Somewhat later to the game is the Garmin GLO. Reviews are just about as good for the GLO as the Dual on Amazon, and I'd expect similar from other stores. It's equally simple, easy to use, and just about the same size. Out of the box, you get the unit, a non-slip pad, a USB charging cable, and an adapter to charge it in a car or properly equipped aircraft, for $129.99 (as of writing). The regular Garmin GLO comes with the unit and the USB cable only, for $99.99.
Though it's a slightly different shape and appears larger, it's 0.0465 square inches smaller, based on the manufacturers' measurements. The size difference being negligible, it's just as portable and doesn't take much room in any bag you'd carry it in. The only button is clearly visible and functions as the power button. One press turns it on, and a press and hold will turn it off. The USB port is on the side of the unit by the power switch, in the open. Additionally, there are no special switches to switch between devices.
A press of the power button will bring it to life, and just like the XGPS150, the blue Bluetooth light will flash until it's connected to another device, and the green GPS light will flash until it has acquired enough satellites for an accurate position. In the iPad settings panel, you'll find Garmin GLO #[serial number]. Click to connect. Enjoy.
No apps for the GLO, unfortunately.
Side by Side
Looking at the above summaries, they seem like they're just about the same, and they really are. Even through my simple testing, they came up about the same by the numbers.
Here are the side by side manufacturer specs:
Garmin GLO
Dual XGPS150
Weight
2.12 oz
1.8 oz
Size (L/W/H)
3.04/1.65/0.70"
2.25/2.25/0.75"
Battery Life
12 Hrs
8.5 Hrs
GPS
GPS/GLONASS
GPS
WAAS
Yes
Yes
Refresh
10 Hz
>1 Hz
Just in case you forgot your old physics knowledge, 1 Hz is once per second. In the case of refresh rates, more Hz is better. Dual's website only says "at least once per second," so I just indicated that as greater than 1 Hz, or >1 Hz.
Before I provide the data from my tests, I want to be very honest in that these tests were done literally in my back yard and not in some field. Both devices proved very capable of picking up signals both outside and even inside. In any case, both devices were tested in the same spot, so despite not being in the middle of an open field, the same disadvantages were present for both devices. Additionally, when testing the vertical accuracy, I gave it a +/- 10 foot buffer and stopped the clock when it reached that. I included the first altitude indication time as well.
Here are the test specs:
Garmin GLO
Dual XGPS150
Bluetooth Connection Time
14 sec
5 sec
Position (2D) Time
22 sec
18 sec
Position (3D) Time
30 sec
30 sec
Accurate (3D) Time
49 sec
100 sec
Conclusions and Other Notes
The Dual had a clear advantage in its Bluetooth time, while the Garmin seemed to fully latch on to the satellites slightly faster. The Dual satellite times may be slightly longer as my iPad seemed to be arguing with it at first. This was shown in the fact that I had to close ForeFlight and reopen it before I could see a position the first few attempts. I believe I got it sorted out for some more accurate times, but I want to put that out there. The fact that they both provided vertical data at about the same time leads me to give the Dual the benefit of the doubt on the accurate 3D time.
To be honest, you're not going to go wrong with either device. They're just about even all around, both in performance and ease of use. The Dual does have an app for the iPad so that you can check up on the device. At the very least, it's nice to know what the battery life is looking like, which is possible in the app. The lack of an app for the Garmin doesn't set it back too far, but there's some mystery in how much battery life is left if you haven't just charged it. This is also somewhat offset by the fact that the Garmin's non-slip pad has a cutout where the charger can fit, which allows you to plug it in while using it in its non-slip pad. The Dual's pad hides the charge port entirely, and even then it's hidden behind a door. You could easily remedy that issue with scissors by cutting the pad where you'd like to have access for the charger.
Both devices will have issues with heated windscreens, but most have reported good results after moving the device into the cabin. The range of Bluetooth being about 30 feet allows you to move it just about anywhere in any aircraft where you'd want an external GPS.
There really isn't a clear winner, and as a result, I'm not going to say you should go get one or the other. In the end, it'll probably come down to a price issue. In order to get the same features (minus the strap) for the Garmin, you have to spend an extra $30, so despite all else being just about equal, there's that. Hopefully I've provided enough information for you to make a more informed decision.
If you'd like to see anything else reviewed here, let me know on the Facebook page, or @TheLifeOfAPilot on Twitter.
Right after graduating from Virginia Tech, I took a job at Dulles Airport (IAD) working the ramp for the summer. While I was there, I met a few other pilots working the ramp along with me. One of them was a guy named Woody, and through the wonderful invention called Facebook, we've managed to stay in touch over the years. Since we're both trying to build time, we've mentioned flying a few times, but never actually followed through. This time, though, it worked out.
The plan was to sit right seat and log PIC time while Woody got some simulated instrument time on a cross country flight around central Virginia. The original plan was to fly from Potomac Airfield (VKX) to Louisa County (LKU), Lake Anna (7W4), Chesterfield (FCI), Williamsburg (JGG), and then back to VKX. The last renters left the plane at Maryland Airport (2W5) the night before, though, so the departure point had to change. Luckily, that airport is outside the Flight Restricted Zone (FRZ), so we didn't have to deal with that nonsense. Once we got to the airport, Woody changed the plan to 2W5, Gordonsville (GVE), LKU, 7W4, Newport News (PHF), and then back to 2W5. I had no objections, so I jumped in, set the ContourGPS in the mount, the Garmin GLO up on the glareshield, and the iPad in my lap.
I tried something slightly new this time since I had both cameras. Yes, both. You haven't been formally introduced to the new one, but if you were paying attention to my post about my new pilot bag, I briefly mentioned it. I used the ContourGPS for the time lapse portions, and the new ContourROAM for videos of takeoff and landing. Thinking back on it, I should've reversed that, but you know what they say about hindsight...
First Leg: 2W5-GVE - 0.8 hours
Say what you want about the random music. I figured something needed to be done for the completely silent cruise portion.
As I was mainly along for the ride as a safety pilot, Woody was at the controls for the departure. I only briefly took the controls so that he could put the blinders on. For not having flown under the hood in what he said was a while, he did a good job, especially with a directional gyro that precessed terribly. For the non-pilots, the directional gyro is like a compass, but without some of the errors present in magnetic compasses. The problem of the gyro is that over time it precesses, which essentially means it drifts away from the real heading, so you have to update it by comparing it to the magnetic compass. It's really not as complicated as it sounds, but it's something we have to pay attention to. As we got closer to GVE, I "vectored" Woody towards the runway. After he took off the blinders, he set the plane down on GVE's short, less-than-level runway. Arriving at the ramp, he shut the plane down and we jumped out to get our Virginia Aviation Passports stamped (the same type of passport used as an excuse for a flight down to Richmond in February). The stamps for smaller fields like GVE are normally kept in a mailbox, but in searching for said mailbox we ran across an airport building halfway through a renovation, and a giant garden spider (the black and yellow ones that make webs with zig-zags in them...you know...those).
After getting the stamp, we jumped back in the plane to head to LKU, which is close to Lake Anna.
Second Leg: GVE-LKU - 0.3 hours
The flight over to LKU was slightly more eventful. As anyone who reads the blog regularly knows, I end up doing at least one short-field takeoff on most flights. Half of it is because I find them to be fun, and the other half is that you never know when you'll need to do one. Well, today we needed one. GVE's runway is only 2300 feet long, it dips in the middle with trees close to the ends, and we were in a P model with two heavier guys in it. I've taken off from shorter, but not with that combination of issues. It wasn't my best short field takeoff, but I'll blame it on having to fly from the right seat, which I've done before, but I don't do it often.
The fun didn't end there, though. After takeoff Woody put the blinders on, took the controls, and put us on course to LKU. As we were climbing, I noticed a Piper opposite direction, about 500 feet above us (01:45 in the video - the wide angle lens on the camera makes it seem farther away than it was). It caught me a little by surprise, so I reached forward and put pressure on the yoke to halt the climb temporarily. As soon as they passed, Woody continued the climb. Closer to LKU, Woody brought us around the pattern and set down. We parked by the main airport building, which had an attached hangar with a Civil Air Patrol glider in it. After walking inside, I spotted the passport stamp sitting on a counter, so I grabbed my stamp, walked back out to the plane, and grabbed a picture.
Next up was 7W4.
Third Leg: LKU-7W4 - 0.3 hours
The departure from LKU was relatively simple compared to GVE. The runway is nearly twice as long and two and a half times as wide, so it was nice and easy. Just like the last leg, though, it was pretty short, time-wise. Still, Woody was able to pick up some time with the blinders. Things got interesting as we got closer to 7W4, however. Because the ramp is at the east end of the runway, pilots like to save time by departing to the west, and arriving to the east. As I switched the radio to the airport frequency, I heard a pilot call and say he was departing Runway 26. So, just like the approach to LKU, we would make our way around the pattern to land west. What I didn't hear, however, was a second plane make a call to indicate he was taking off behind the first plane. It wasn't an issue, but it surprised me when I saw two bright yellow crop dusters rise off the runway and turn north. The landing was uneventful, but it wouldn't be the last time we saw those crop dusters, or the last time they would surprise us. Woody rolled out to the end of the runway, where we turned around and taxied back to the east end to shut down and search for the stamp. While he made a call ahead to Atlantic Aviation at PHF to reserve a crew car, I found the mailbox and stamped both of our passports.
Fourth Leg: 7W4-PHF - 0.9 hours
As I mentioned earlier, that wouldn't be the last time we'd see, or be surprised by those crop dusters. This time, the surprise made the Piper incident earlier pale in comparison. As Woody was running preflight checks, I monitored the airport frequency. When we were ready, I called to announce the westbound departure, which was what the flow of traffic was: the two crop dusters departed to the west, and we landed to the west. After the call, however, one of the dusters called and said they'd remain clear and circle away from the airport, because they wanted to land to the east (to save time, as mentioned earlier). I took his word for it, though I did check the pattern legs quickly to be sure. While we were rolling down the runway, I spotted one of them crossing our departure path, north to south, rolling to make a knife-edge pass and turn westbound. I called the traffic out to Woody, who turned north to avoid turning towards him. Since I remembered the duster had a buddy who wasn't making radio calls, I searched ahead of our turn and spotted him at the same altitude (both of them had been down on the treeline) to the east of the field. You can just barely make them out in the video. As I mentioned with the Piper, the wide-angle lens makes them appear farther away. If you can't see them, use full screen and 1080p. The annotations help to mark where they appear a few seconds ahead of time.
Once we were clear of that mess, I switched to Potomac Approach to coordinate getting over to PHF. In order to take the most direct route, we would fly through Richmond's Class C airspace, so we were required to be in contact with them. We passed the cruise time by discussing the ATC hiring process, and the overall poor quality of the pilots that Potomac had to deal with. A couple pilots either weren't paying attention or just had a poor grasp of English, which we found entertaining. The controller, not so much.
Closer to PHF, we passed over Busch Gardens on the way to land on Runway 20. Since we couldn't spot the Lear landing on the crossing runway, tower had to ask us to do just about everything possible to delay our arrival, to include entering on a 6 mile final, s-turns, and a tight 360 turn on short final. You'll see all of it in the video. What you can't see, however, are the training aircraft that were on the ramp for ATAC, which is a firm that provides training for military pilots by flying aggressor or foreign aircraft to show the pilots the capability of their potential enemies.
We parked at Atlantic as an AirTran 737-700 prepared to depart. Woody grabbed the car, and we sped off to get burgers at Red Robin. As we were sitting at lunch waiting for our food, we pulled up the weather to see if anything had changed. Of course, more storms were going to be passing through as part of another frontal system, similar to the ones last night. The mutual debate continued when we got back to Atlantic. After a call to a flight briefer, we decided it would be best to at least move in the direction of home, and if necessary, land to avoid an approaching storm. This being the strategy, we identified both West Point (FYJ) and Tappahannock (XSA) as bailout points. If you look at the image to the right, you'll see that the band of storms to the south would have arrived much later, while the storms to the north would pass through much sooner. Had we waited for the northern storms to pass, we would have had to try to beat the southern storms out. By departing earlier and stopping in XSA, we cut the wait time for the northern storms and avoided having to try to beat the southern storms out. I point that out mostly to clarify that there was a definite plan to the idea, and not simply "let's see how far we can get before the storms get here."
Getting ready to head home
Fifth Leg: PHF-XSA - 0.8 hours
Tower sent us out right behind another aircraft that would remain in the pattern. By this point, Woody was getting slightly tired of flying, so he passed the controls over to me after turning crosswind. In an effort to continue to let us both log time, I put the blinders on. Woody called Potomac for route guidance, and limited weather info since the storms were clearly visible to the north. As we flew over FYJ, we heard "Cessna 64181, do you have weather radar on board?" The controller's tone conveyed both concern and surprise that a small plane would be out braving the weather. We took the hint and turned northwest bound to skirt the back end of a storm and land at XSA. I didn't mess with the camera as I was flying, which is why you have a time lapse approach and landing. There are a few cool shots of the weather as we passed by it, though.
It took us a minute to find XSA, as there weren't many identifiable landmarks around it, which you can see in the video, but we made it in the end. The red-roofed terminal building made it easy to spot once we got closer. After landing, I brought the plane back to the ramp, parked it, and we both tied it down in preparation for the storms. Inside, one of the airport attendants and a local Virginia State Trooper kept us company while we reviewed the weather and developed a new plan of attack. Luckily, some of the storms had dissipated, and the storm that was supposed to pass over XSA passed well north. Because of that, we were able to leave slightly earlier than we had thought.
I grabbed a drink, and we set off for 2W5 after Woody filed an SFRA flight plan.
Sixth Leg: XSA-2W5 - 0.6 hours
I ended up flying the whole leg to 2W5 from XSA, getting more time under the blinders. Unfortunately, the camera died on the way there, despite my efforts to charge it at PHF and XSA. What you see for the landing video was shot from the ContourROAM up in the mount. I cut the base turn a little early so I ended up high and fast down final. I salvaged it by I bleeding speed over the runway. The landing was flat, but it wasn't too bad in my book. After the taxi back, I parked the plane at the grass tie downs and helped prepare the plane for its overnight stay.
In the end, we both logged about 3.7 hours, each getting a good amount of time under the blinders. I got 0.8 hours of simulated instrument time, which definitely helps towards the instrument rating. This trip also gave new meanings to the term safety pilot, as this was the first time I ever flew safety for someone and actually had to call traffic to avoid a collision. Later on, we both learned the importance of a safety pilot for weather avoidance as well. Despite the traffic issues and the added stress of the weather, I really enjoyed the challenge of the whole trip.
When you're required to have a safety pilot, always make sure you have one, and a helpful one at that. A safety pilot isn't there to be a conversationalist to help pass the time, either. He or she is there to keep you out of trouble. I'm not saying the flight should occur in complete silence unless there's a conflict, but don't bring along your pilot buddy who can't keep their eyes out, or one who shows poor decision making skills.
Beyond that, always remember your tolerances. In ground school, you always hear people say "personal minimums," but I like the term tolerance. How much risk are you willing or capable of tolerating? To some people, the radar image shown above would have kept them on the ground, and I wouldn't blame them. Given the information I had, and the additional safe spots for landing, my risk tolerance was slightly higher because I knew I had options in case the risk became too great.
Every time you put the aircraft in the air, you're accepting risk. How much risk you tolerate is up to you. If you are willing to fly with a higher tolerance, just make sure you cover as many bases as possible to remain safe when that tolerance is reached. Flying VFR doesn't mean you shouldn't have alternates, both in the form of airports, and in the general form of other options.
Hours: Pilot in Command Cross Country (PIC XC): 3.7 - 70.5 (of 50) Actual/Simulated Instrument (Act/Sim): 0.8 - 8.3 (of 40)
For those who don't want the details, here's a quick summary:
iPad with ForeFlight:
One of the best investments you'll ever make for flying. It's capable, quick, allows you to select which charts and maps to cache so that you don't take up space with ones you don't use, stores aircraft you fly, and will even brief and file for you through CSC DUATS. The only slight downside is that if your iPad is the wireless-only version, you'll need an external GPS receiver like the Garmin GLO for aviation, below.
Criticism: The version 4.7 update seems to have deleted the Starred Airports list (yet you can still star them on the airport pages). It would be nice to have that back. It's not a huge deal, though. Update: They fixed this in the last update (4.7.2), which I just downloaded 27.Sep.12 at 2015EDT. Costs: iPad - $499-699 ForeFlight - $74.95 per year (or $149.99 for geo-referenced approach plates) Optional: Stratus ADS-B - $799
Garmin GLO for Aviation: It's basically the normal Garmin GLO with a few extra accessories, which includes a non-slip pad which clings to anything so you don't have to worry about mounting it, or having it slide around during the flight. It boots quickly, locates satellites quickly, and is really easy to connect via Bluetooth. Worth every penny.
Criticism: None from me, but some have reported issues with satellite reception with heated windscreens. Others say it's too easy to bump the power button and turn it on accidentally, but a little care in placing it in your flight bag solves that issue. Costs: Garmin GLO for Aviation - $120
The Full Review: ForeFlight, iPad and GLO
As technology gets more and more convenient, powerful, and compact, it starts to branch out into more and more of our lives. If you asked me if I'd ever use a touchscreen half-laptop to view charts back when I started flying, my response would have been "yeah, eventually, but not any time soon."
It wasn't until 2010 that the first generation iPad came out, and even then the idea that you could use it for that purpose was still just a dream. It's crazy to me that the iPad was released just over two years ago, yet it has already come quite a long way. I jumped at the opportunity to get one earlier this year and ended up putting ForeFlight on that night. I'm no Apple fanatic, but I have to admit that at least two of their products have revolutionized my life, and this is one of them (the other being the iPod).
Note the "No Fix"
I had originally gotten the iPad for work so that I could read and review documents at client sites when I wasn't allowed network access. Since I'd be primarily using it where 3G data wouldn't be an option either, I opted for the wireless version. When I tried to use ForeFlight in ground tests, I found out very quickly that the wireless version does not come with a GPS receiver like those equipped for 3G connections. The lack of a GPS receiver in the wireless model isn't a secret to the industry, though, so there are a few products out there to feed all iPads with GPS data at somewhat reasonable prices. While that was an unfortunate discovery, it didn't hit as hard as it would've if I'd bought the iPad specifically to be an electronic flight bag (EFB).
Even without the GPS function to show you exactly where you are in map view, the app is really great for not having to bother with the paper charts*. Granted, I believe that you should still have some with you, but you don't have to worry about flipping or folding anything and punching your passenger or pilot buddy in the face while using the iPad. The charts may also be cached at your discretion, in order to avoid wasting memory space that you could be using for in-flight audio. Those caching selections are stored, so ForeFlight will only update those maps you've essentially subscribed to. Furthermore, it will cache anything you view until it expires if it's not part of your normal selections. As an example, I don't fly around Los Angeles so I don't cache the area through my settings. If I browsed LAX's departures and arrivals, however, those charts will be cached until the next chart update. It's not particularly useful for my regular flying, but it's a nifty feature to store single charts here and there when you fly commercially and want to follow along.
Beyond simply displaying various charts, ForeFlight also allows you to create chart binders so that you don't need to mess around with the airport information pages to see the relevant charts. If I were to fly IFR from Leesburg (JYO) to Blacksburg (BCB), I could create a new binder with all of the charts necessary for those two airports, and perhaps an alternate or two. If you fly the same routes often, you can save the binders and switch between them as necessary. As you can see in the picture, I created a binder with the approaches I plan on flying during my long instrument cross country flight. I have three different binders for the flight in the case weather messes with the plan, or if I have to change into an aircraft with different equipment.
In addition to chart binders, it also allows you to store various documents from the ForeFlight library. This also has a binder feature like the charts so that you may group your documents. In my case, I have a binder for A/FD supplementals, various books, and the chart legends. In the binder with various books, I have all of the books they had available, including a copy of the AIM, Instrument Procedures Handbook, and the Pilot/Controller Glossary. So, if you're in the middle of a flight and there's a disagreement on the proper way to enter and exit a traffic pattern, the pilot not flying can pull up the AIM and settle it on the spot. Oddly enough, the FARs aren't in the library.
Weather is, of course, important to keep on top of both before and during your flight, and ForeFlight is just as capable there as any of the weather sources you may frequent. Graphical AIRMETs, SIGMETs, turbulence, icing, Doppler radar loops, outlooks and significant weather outlooks, PIREPs, prog charts, satellite imagery and winds aloft are all at your fingertips. Limited data is also available for Mexico and Canada. If you're looking for weather during your flight, you can always enable the weather overlays in map view with the Stratus ADS-B receiver, which costs a pretty penny, but has some nice capabilities. If you fly in the mid-west, though, make sure to check the coverage map as ADS-B receivers haven't fully covered the country.
Closer to departure, you can brief yourself and file your flight plan using your CSC DUATS account, which you add in on the Settings page of the app. The File & Brief page allows you to view a history of your flight plans as well, so you don't have to create a new one every time. Additionally, you can store the aircraft that you fly to make the filing easier. When you add the aircraft, drop down boxes guide you through the process of selecting equipment codes, default altitudes, and even generating the aircraft color codes. At the bottom right of the page, you can see both brief and file buttons, which will get you on your way.
The Scratchpad is a quick way to jot down information like frequency changes, clearances and so on. I've found that it's best used with a stylus, but your finger will work almost as well. There's a button at the top right that allows you to adjust the size of the text as you draw. The picture shows the finest setting. When it's bumpy, I normally revert to using the plane as my scratchpad (when I have a radio with a standby slot), or pen and paper. There is also an option that allows you to type, if you'd prefer that. Just keep in mind that the iPad's spellcheck isn't up to date with aviation shorthand. It isn't perfect, and I liken it to writing on a whiteboard as you can't rest your hand on the writing area when writing, but it gets the job done. The only other downside I can think of is that in order to erase, you have to clear the whole screen. For the quick notes you'd be writing in the air, though, you don't necessarily need it to be pretty, so it's not a huge deal.
When it comes to plotting your flight plan on the maps, ForeFlight is capable of more than just airports, navaids, and fixes. Airways are also understood so you can save time by entering the plan just as you would in your filed plan. Beyond that, there are a few other features that will help you choose altitudes based on observed winds aloft, and see your estimated fuel burn and time en-route. The NavLog will also break it down leg by leg, if you need the extra detail. When it comes to overlays, you have options for radar, satellite, TFRs, AIRMETs, SIGMETs, flight rule indicators for the airports, airport temperatures, airport temp/dewpoint spreads, visibility, wind, ceiling, sky coverage, PIREPs, lightning, and fuel prices for both Jet-A and avgas. The bottom panel also has four buttons that can display groundspeed, GPS altitude, track, signal accuracy, ETE to next, ETA to next, distance to next, bearing to next, cross track error, ETE to destination, ETA to destination, distance to destination, bearing to destination, current lat/lon, or Zulu time. The amount of information at your fingertips is nearly endless.
Here are a few more screenshots of the ForeFlight interface:
The left screen is the altitude selection page. Note the inclusion of the wind data to help you in your selection. The right screen is the settings page, where you can set default units, among other options. You can even change the position symbol on the map from a high wing, low wing, jet, fighter, or helicopter.
As mentioned earlier, for those of you who don't have your iPad on a 3G data plan, you don't have the built in GPS receiver and will have to get an external receiver. There are a few different units out there, with the more notable ones being the Dual, Bad Elf, and Garmin units. I ended up getting the Garmin GLO for Aviation because it was about the same price as the Dual and came with the accessories that I expected I'd need. The non-slip pad clings to just about anything. You can see I have it on wood in the picture at right, but even on that surface I have to pick it up by the corner, otherwise it stays suctioned in place. The steady blue light means it's connected to the iPad via Bluetooth, and the steady green means it has picked up the required number of GPS satellites. The button where the green light is serves as the power switch, and is the only button on the device. In front of that is a USB port to charge the device. After opening the box, turn it on, enable Bluetooth on your iPad, look for "Garmin GLO" in the list, and select it. Done. It's really that simple.
The whole setup really makes working in the cramped space of most smaller planes a breeze. It also helps add in some situational awareness when compared to following along on a paper chart, or even certain moving-map GPS units. If you're looking at the various EFBs available on the market, you should definitely consider it. Some of the other EFBs are aimed more at the corporate setting, which you can see in the way they structure their pricing. I'm not saying that they aren't useful to the GA pilot, rather I'm just attempting to point out that the target market might not be you in all cases. Jepp does have their own version using Jepp charts instead of NACO for a comparable $76, and is aimed at the private and corporate pilot group. Most of them have trial periods as well, so you don't have to worry about risking anything until you try it and like it.
Hopefully this helped you in your decision. If you have questions, the best spot is the blog twitter account @TheLifeOfAPilot.
*A note on charts: it's a common misconception in many pilot circles that charts are required any time you fly. Charts are only required when flying large or turbojet aircraft, or when flying Parts 121 or 135. The official FAA stance may be found here. While I don't condone flying without charts, I wanted to point out that you wouldn't be breaking regs by dispensing with paper charts.
The other night, I was hanging out with my friends Christina and Brittany and the idea of flying this weekend came up. No plans were set in stone, so when the idea came back up I was somewhat surprised. At first, since the flight would be between lunch and dinner, I figured we'd just fly down to Luray (W45) and back. As the time came to head up to the airport, I changed my mind and decided and Charlottesville (CHO) because I needed food, and you all know what my go-to is by now. Just like last time, the plan was to head to Timberwood Grill. I've been there all too much over the past year, so I'm going to go on the record and say that trips to CHO are going to be drastically reduced for a little while. I feel like I'm missing out on a lot of other destinations.
Sorry Timberwood - I still love you.
On to the narrative.
After getting to the airport, Christina, Brittany and I grabbed the flight book and headsets, and walked out to the plane in weather that I'd consider to be just about perfect. After the preflight, they both climbed in the back while I set up my Garmin GLO GPS (which I just got in the mail on Thursday - I'll review it with ForeFlight eventually), ContourGPS, and the rest the technology.
The taxi out took a longer amount of time than normal because the nice weather brought everyone out. Whereas there are normally only one or two people ahead of me, I ended up heaving two departures and two arrivals ahead of me by the time I finished my engine run up. Once they had all done their thing, I was able to get up and out. I got a video of the departure, but it was just downright ugly with the wind that had picked up so I didn't upload it. This being Brittany's second flight ever - not just in small planes - the bumps weren't appreciated. Reaching cruise, though, the bumps smoothed out.
Yes, this is the big EMB-145
Getting closer to CHO, I called the tower and was instructed to call back when I reached the downwind for Runway 3. As I entered the downwind, a Piedmont (regional carrier for US Airways) Dash 8 called in and was cleared to land ahead of me. I turned in behind it, landed, caught the first exit and brought it in to the Landmark ramp. I had the Contour running the whole flight, but I didn't upload any of it because nothing truly interesting happened (and I'll admit the landing wasn't the best, either). After parking, an American Eagle (regional carrier for American) Embraer 145 taxied out to the runway, prompting Brittany to comment that "it's so BIG!"
As usual, I was greeted with "you gonna want the crew car?" As much as I like being recognized, this is more evidence that I need a break from CHO. In an effort to break the norm in some way, I actually switched it up at dinner and got an Al Capone burger.
ForeFlight running with a Garmin GLO
and iPod on the aux input
On the way back, I spent a little more time testing ForeFlight, while we listened to my iPod through the aux cable I bought a while back. For those who are wondering how that works since pilots need to listen for other pilots and air traffic control, the aux input is overridden any time someone speaks, either in the aircraft or over the frequency. That ends up making listening to music frustrating at times, but it's worth it for longer flights, especially at night. Having GPS input on ForeFlight really makes it that much more worth it, as well. Now, every plane I fly essentially has a moving map GPS. Granted, I can't shoot approaches with it, but it really helps.
As we got closer to Leesburg, the bumps picked back up as a result of the wind having increased and the lower altitude. The JYO traffic frequency was really busy with one in the pattern, a MedFlight helicopter inbound, and two other aircraft approaching from the north. The two approaching from the north had apparently gotten really close to each other, and there was an interesting exchange between the pilots that clogged up the frequency for a while. I compensated by making my calls really short, but I still ended up getting stepped on a couple times by the other pilots. Despite all of the radio traffic, I managed to get in during a break in the traffic.
You'd think that it was easy from then on, but it wasn't. The wind really messed with me, with gusts making it difficult to hold a proper speed down to the runway (which you can definitely see in the graph to the right of the video below).
Enjoy said video of me getting my butt kicked all the way down final:
[Video was here until Contour closed down for a bit, and the video was lost.]
Didn't expect that greaser of a landing at the end, did you?
Hours: Pilot in Command Cross Country (PIC XC): 1.7 - 66.8 (of 50) Actual/Simulated Instrument (Act/Sim): 0.0 - 7.5 (of 40)